Before the existence of my homelab, I’d dabbled in web and network management but hadn’t needed to deal with server configurations beyond clicking the deploy button on Azure or AWS. While setting up this wordpress site, and the other servers on my network, I quickly realized I’d need a way to access a bunch of separate web apps over the web.
This immediately seemed like a problem: I didn’t have a static IP for my WAN, let alone a block of IPs I could use for a bunch of different servers. I also expected to constantly be provisioning new VMs and services that I’d want to access remotely or use for a public web app. Buying a static IP for each and every thing I’d spool up would be time and cost prohibitive (especially if it meant having to talk to my ISP every time).
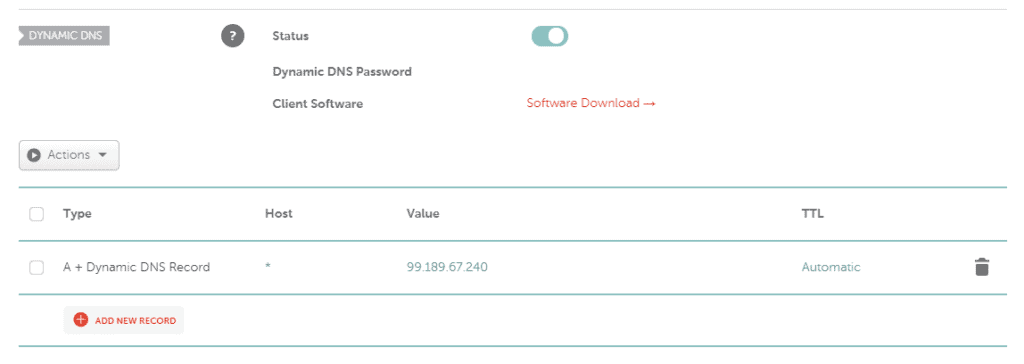
Solving the static IP issue for a single machine is easy enough: dynamic DNS (DDNS) setups have been around forever, serving as the backbone of active directories and helping people host sites from home. There are free options for dynamic DNS that even give you a renewable URL, no credit card needed. I wanted something a bit more robust, and that would play nicely with the Ubiquiti networking gear (more on that setup here). In the end, Namecheap was my choice: their domains were cheap and DDNS was free. Configuration is as easy as setting a special type of A Record that Namecheap uses – as a bonus, it seems like there’s practically no lag in applying DNS settings or record changes on Namecheap!

The last step of the DDNS process was hooking it up to my Ubiquiti Unifi Security Gateway (USG), which acts as my firewall/router. Its at this point where Namecheap became the obvious winner in my book: their DDNS client is baked right into the USG web interface. Clicking on namecheap as the DDNS option under Gateway settings configured almost everything for me, with the exception of setting the mandatory “server address” field. A quick google showed that others had used “dynamicdns.park-your-domain.com” as their Namecheap DDNS server, and plugging that in seemed to work.
Once I had the settings configured and applied the provisioning to my USG, my WAN’s IP address showed up almost immediately in the Namecheap DDNS manager. Next, it was time to move on to solving the “many servers, one IP” problem. Googling for possible solutions quickly led me to the idea of a ‘reverse proxy’ or ‘gateway’ setup: essentially, one server would become the ‘post office’ for the rest of my web apps. I’d port forward from my USG to the reverse proxy server, where the source domain name for each connection would be used to sort connections from clients to each of the different servers on my local network:

There are a couple of good packages out there that can do reverse proxying – in essence, its the same problem as load balancing for a website with tons of traffic. As a result, all the normal web server packages have some kind of reverse proxy support. Apache and Squid both have the capability, but seeing as I’d previously used NGINX and liked its architecture, I decided I’d try an NGINX-based approach first.
The first step was choosing where NGINX would live. There were two clear options: on the USG itself, or on the Ubuntu VM that I use to host the Unifi Controller software. Both are already running 24/7, so some pros/cons:
On USG: Since the USG is essentially an Edgerouter in consumer-friendly clothing, installing natively is certainly possible but considering the performance limits of the base-model USG, I was weary of adding any additional load. I also wanted to avoid messing up my ATT Fiber Gateway bypass.The benefit would be persistence: if my VM host goes down, it wouldn’t take my reverse proxy (and my ability to access the iLos on my HPE Proliant servers) with it.
On Ubuntu/Unifi VM: The Unifi Controller VM is a small Ubuntu desktop instance that I configured so I could easily modify controller software and config files within the ESXi web console. I would be able to resize the VM based on performance issues, and wouldn’t risk overloading my router. I also wouldn’t need to worry about bricking something and taking my network with it.
Based on the above, I decided to install NGINX on the existing Ubuntu VM that hosts my Unifi Controller. That way, as long as my controller is up, my proxy is as well. Plus, I’d have a desktop GUI to futz around with configuration files and manage updates, which seemed friendlier to the setup process.
Initial installation of NGINX was easy:
sudo apt update
sudo apt install nginx
sudo ufw allow 'Nginx Full'
I opened up the ufw firewall as much as necessary for NGINX since I know I’m going to be using both HTTP and HTTPS. If you only need one or the other, ‘NginxHTTP’ and ‘NginxHTTPS’ are also options.
Next, I set up port forwarding of the essential ports for webhosting (80,443 for TCP/UDP) on my USG’s firewall. The VM already had a static IP for the Unifi Controller software, so if that isn’t already set up do that too. With everything installed and working, I typed in my domain name to see if my DDNS->NGINX setup was live:

With NGINX live, it was time to start working on configuring the reverse proxy setup. To keep things as simple as possible, I left my nginx.conf file completely stock – I can always go back and tweak things later if needed. Instead, I started by installing a wildcard SSH certificate for my domain: *.dupuis.xyz. A wildcard certificate will let my reverse proxy server be an SSL gateway for all connections to the subdomains/servers in my LAN. This means that the encryption isn’t “end-to-end”, but for my purposes I’m happy with “end-to-my-hardware”, but that’s my own risk management call. I started by installing certbot, which is a tool for generating/managing free SSL certificates from LetsEncrypt.org:
sudo add-apt-repository ppa:certbot/certbot
sudo apt-get update
sudo apt-get install python-certbot-nginx
With certbot installed, I was able to generate a wildcard certificate with:
sudo certbot --server https://acme-v02.api.letsencrypt.org/directory -d *.dupuis.xyz --manual --preferred-challenges dns-01 certonlyDuring the certificate generation process, certbot asked me to create a TXT record with my DNS that lets the DNS challenge process work. If your DNS is slow to update, wait a bit once you make the change before letting certbot run it’s challenges, or you’ll just have to repeat the process over. Once certbot finished, I had valid, externally-signed certificates for my domain that I could include in my NGINX SSL definitions within my server blocks that would work for any wildcard ___________.dupuis.xyz subdomain.
The last step of getting my basic reverse proxy setup working was adding server configurations to NGINX. I went to /etc/nginx/sites-available and opened up ‘default’ in my preferred text editor. My first goal would be proxying one of my iLo web server instances (bad security, I know…. but so convenient, and I can patch the hole later). I deleted everything in the default configuration and started by adding a basic HTTP->HTTPS forwarder:
server{
   listen 80;
   return 301 https://$host$request_uri;
}
This will make sure all incoming requests get punted to HTTPS. Next, I made a new file in sites-available named ilo and added my proxying server configuration:
server{
   listen 443;
   server_name ilo.dupuis.xyz;
   ssl on;
   ssl_certificate /etc/letsencrypt/live/dupuis.xyz/fullchain.pem;
   ssl_certificate_key /etc/letsencrpyt/live/dupuis.xyz/privkey.pem;
   location / {
	proxy_set_header X-Forwarded-For $proxy_add_x_forwarded_for;
	proxy_set_header Host $http_host;
	proxy_set_header X-Forwarded-Proto https;
	proxy_redirect off;
	proxy_http_version 1.1;
	proxy_pass https://192.168.1.4;
   }
}
If you look carefully, you’ll notice that I’m using HTTPS in the proxy_pass statement: this is re-encrypting the traffic between my reverse proxy and the source server inside my LAN, which makes this as close to end-to-end as I would ever need it to be, and makes the SSL-checks on my iLo instances happy enough to not complain constantly. Thanks to Reinout ven Rees’ article for helping clarify this setup – check it out for more details.
Finally, since NGINX only looks in /etc/nginx/sites-enabled for active configuration files, I added a symbolic link from the sites-enabled folder to my new ilo configuration:
sudo ln /etc/nginx/sites-available/ilo /etc/nginx/sites-enabledNow that everything should be configured correctly, I ran the NGINX configuration tester, then reloaded the service:
sudo nginx -t
sudo service nginx reload
Since everything came back clear, it looked like the reverse proxy was up and running, and I tested by going to https://ilo.dupuis.xyz:

Success! With everything correctly configured, I was able to directly access my iLo instance over https from anywhere in the world – awesome. Adding another server is as easy as adding another server block/site definition inside sites-available, symbolic linking to sites-enabled, and reloading NGINX. Much less painless than talking to ATT, and much cheaper too.
Hopefully this runthrough is useful to get a reverse proxy set up on your own home network too. There will be more posts coming about getting everything working for ESXi (so you can remote console successfully over HTTPS) and for configuring a WordPress instance to work behind a reverse proxy as well (without horrible errors from Chrome about mixed media sources). In case you want to make everything even more secure, check out this article from Stephane Caron on improving NGINX security with DH parameters and SSL session configurations.
If you have a question, or if there’s something I did wrong/could do better, leave a comment and I’ll get back to you as soon as I have a second. Thanks for reading!


